The Chat and Social Connect Settings let you control how your users interact — from one-to-one chats to social wall posts and comment permissions. Here’s a simple guide to help you configure it right.
Steps to Configure Chat & Social Connect
- Login to Your Dashboard
Go to your Nrich Learning admin dashboard and navigate to the Settings section.
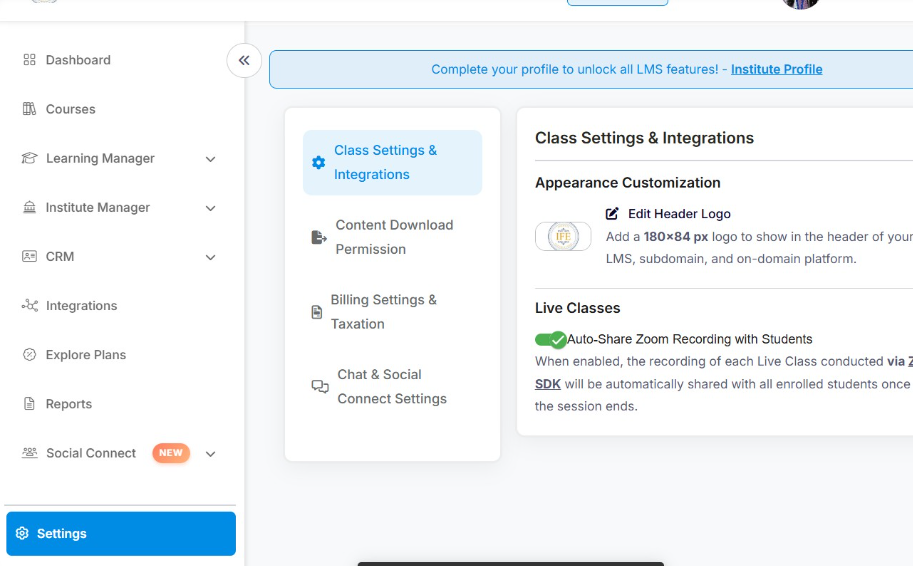
- Open Chat & Social Connect Settings
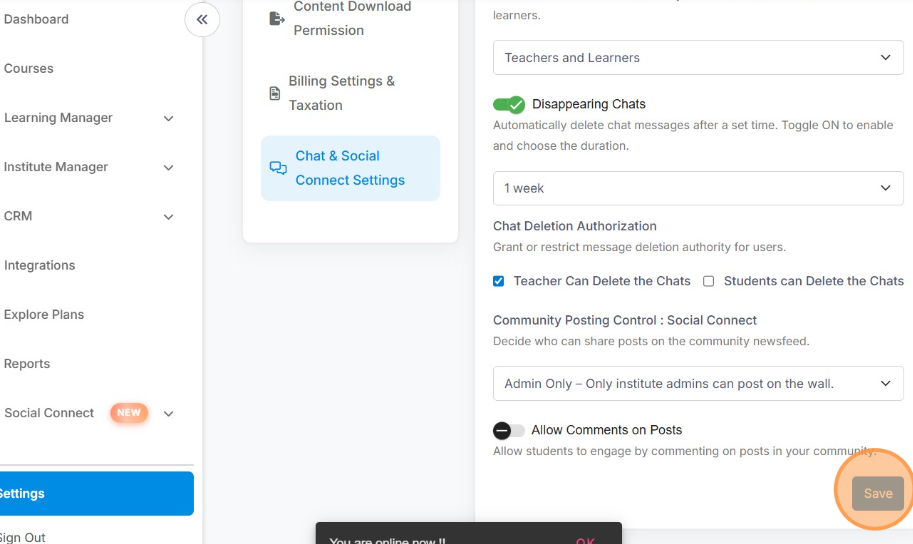
Inside the settings page, locate and click Chat & Social Connect Settings to open all communication-related controls.
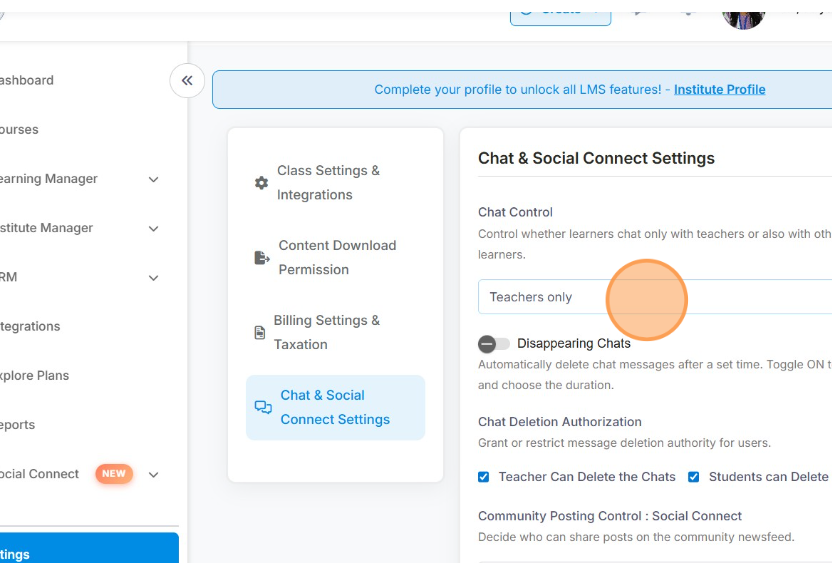
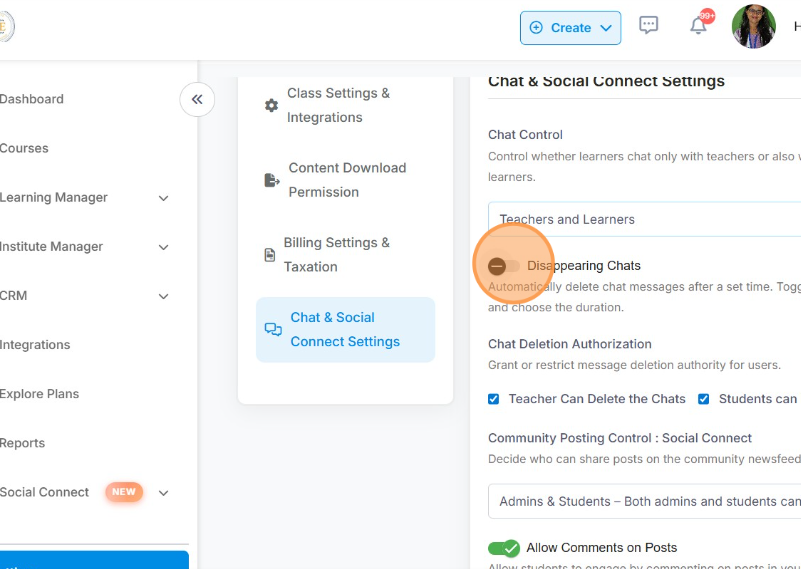
- Set Chat Permissions
Choose how chat works in your platform:
- Teachers only — learners can chat only with teachers.
- Teachers and Learners — enables both peer and teacher-student chats.
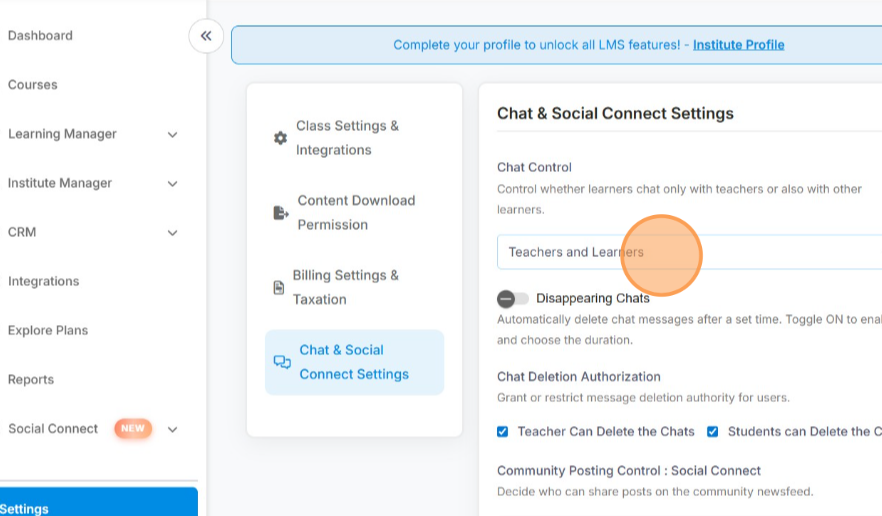
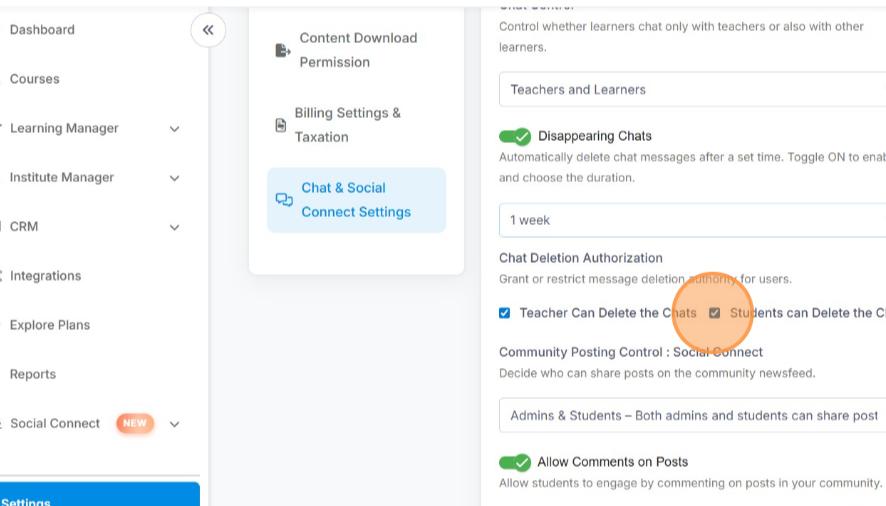
- Enable Disappearing Chats (Optional)
If you want messages to auto-delete, turn ON the Disappearing Chat toggle.
Then, choose the duration (e.g., 24 hours, 7 days, 30 days).
- Manage Chat Deletion Rights
You can decide who can delete chat messages:
- Allow teachers to delete messages.
- Allow students to delete messages (optional).
Enable these by checking the relevant boxes.
- Allow teachers to delete messages.
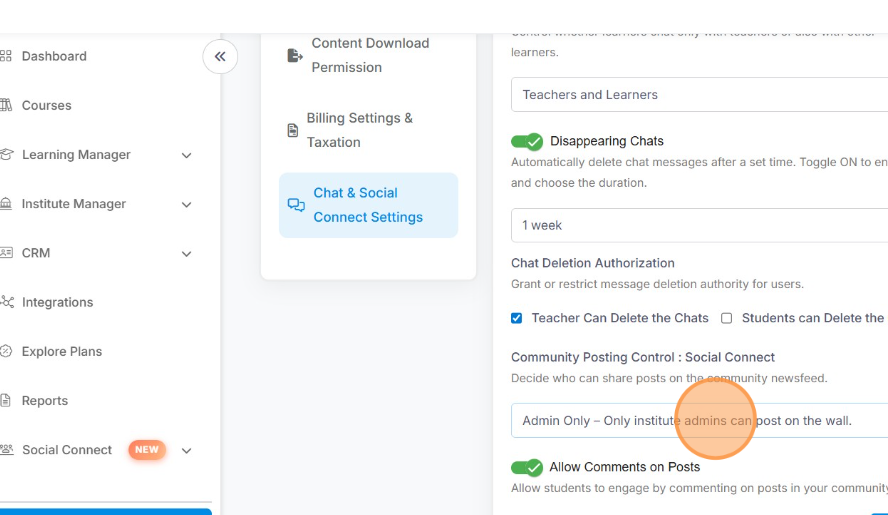
- Control Who Can Post
Decide who can share updates in your community feed:
- Admin only — restrict posts to admins.
- Admins & Students — open posting for both roles.
- Admin only — restrict posts to admins.
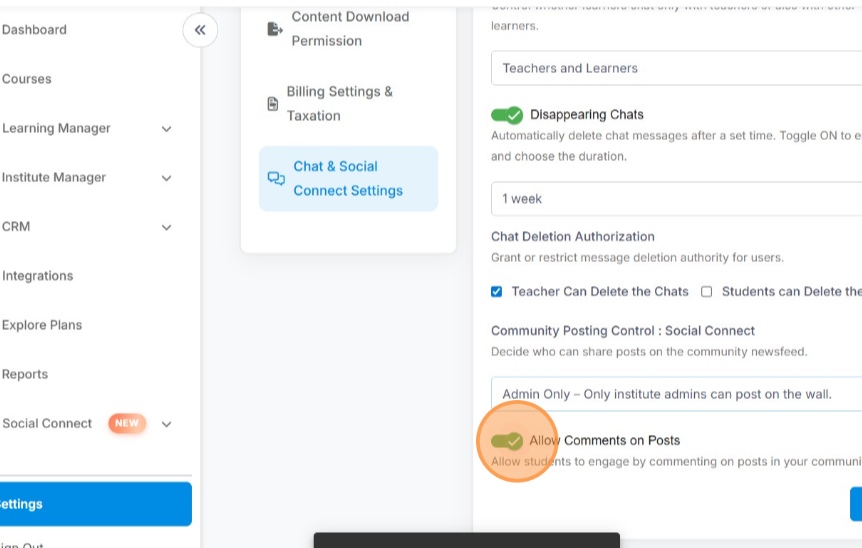
- Allow or Disable Comments on Posts
Toggle the Allow Comments setting to enable or disable comments on the social wall or newsfeed.
- Save Your Changes
Once done, click Save to apply the configuration.
Was this article helpful?
YesNo
Last modified: October 15, 2025